How to Prep Your Skin for Makeup: Expert Tips & Advice

How to Prep Your Skin for Makeup Expert Tips Advice
If you’re an expert at applying makeup, but it’s still not blending right or setting properly, the problem might start before you even apply a lick of foundation to your skin. That’s because if you don’t prep your skin right for makeup, then your cosmetic products won’t look as nice no matter how much you blend them. In this ultimate guide, we offer 16 tips for how to prep your skin for makeup, from exfoliating away dry patches to moisturizing your lips before applying lipstick.

Remove all your old makeup.

Ideally, you should be removing all your makeup at night before you go to sleep, but we know that life sometimes gets in the way. That’s why we formulated our makeup removing wipes for those times when you’re too tired or busy to wash your face. You can also use a cleansing balm or oil cleanser if you’re committed to rinsing your face. Be sure to follow it up with a gentle face wash to get rid of any remaining dirt and debris so that you’ll start with a perfectly clean canvas for new makeup application. For more tips, check out our guide that explains how to remove makeup the right way.

Use cold compresses for puffiness.

Many people wake up with swollen, puffy faces in the morning. This is especially common in side sleepers, since all the blood and lymph drains to one side of their face. If you apply makeup in the morning, you might benefit from applying a cool rag or a cold compress to your face. This will help to reduce swelling and puffiness and make your face appear brighter and more awake. You can do this either before or after washing your face, whatever is your preference. We also recommend using cool water to wash your face to reduce puffiness even further.

exfoliate your skin

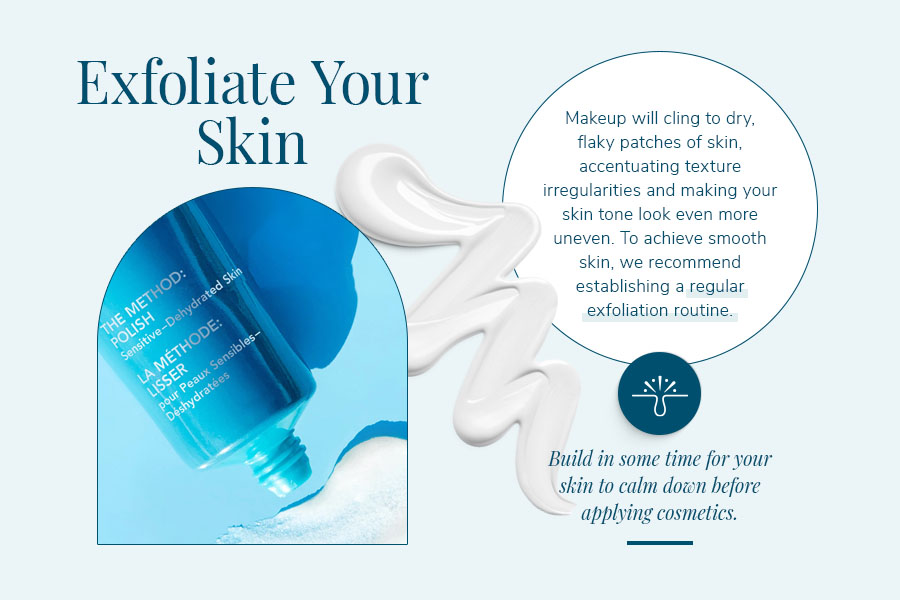
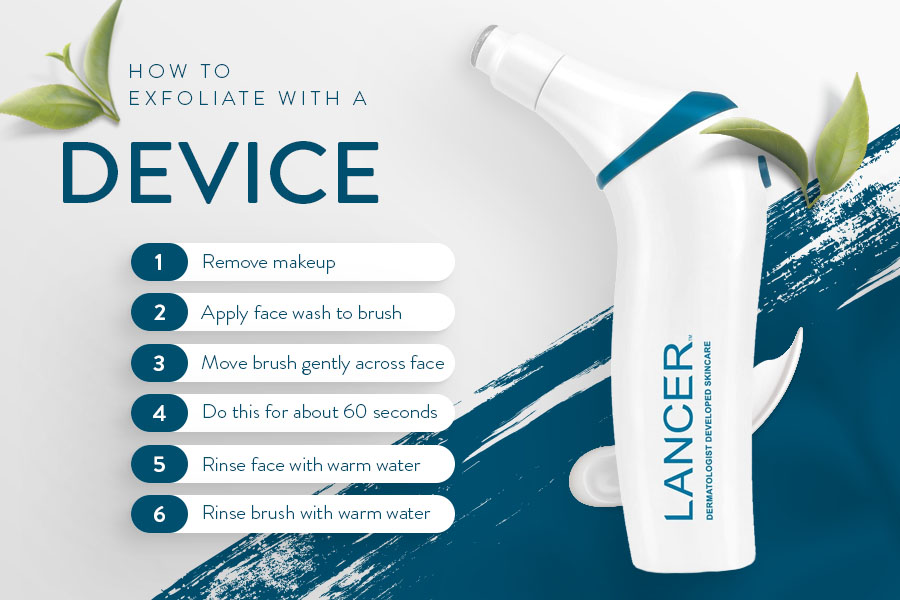
Exfoliate your skin regularly.

Makeup will cling to dry, flaky patches of skin, accentuating texture irregularities and making your skin tone look even more uneven. To achieve smooth skin, we recommend establishing a regular exfoliation routine anywhere between one to three times a week depending on how sensitive your skin is. If you haven’t exfoliated in a while and your face is looking scaly, and you need to apply makeup soon, then use a face scrub or a powerful exfoliating mask to get rid of flaky patches quickly. Bear in mind that exfoliating can make your face red and sensitive, so build in some time for your skin to calm down before applying cosmetics.

Try an eye mask or cream.

If you struggle with dark circles and puffy eyes, a concealer will only do so much to cover it up. In fact, heavy layers of concealer can settle into fine lines around your eyes, making their appearance more obvious. Instead, treat the problems at the source by using a dedicated eye mask or cream that is specifically designed to help brighten up tired eyes. Masks will need to be left on for a certain amount of time to get the full benefits (usually 15-20 minutes) so leave yourself enough time to apply and remove the masks. As for eye creams, you just need to let them soak in before applying eye makeup.
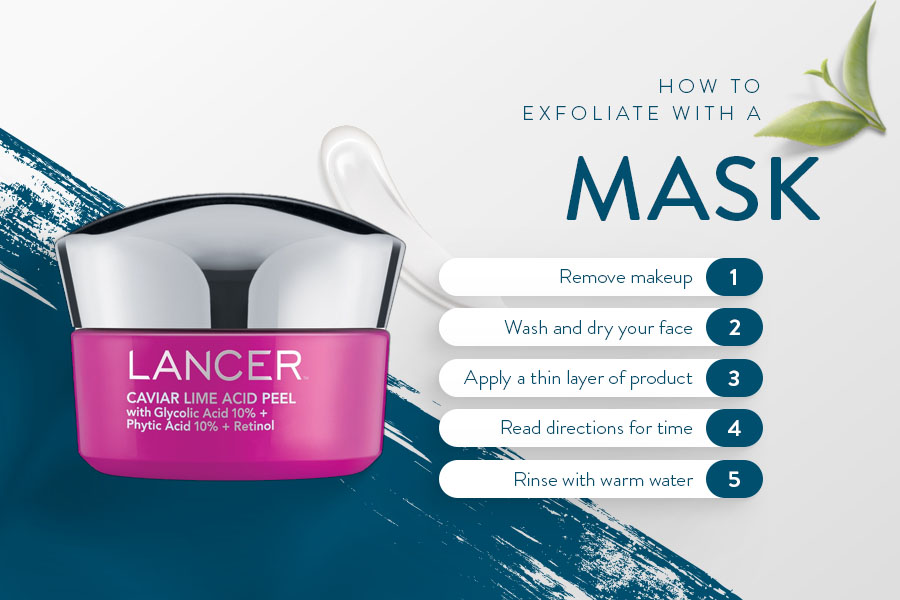
Do a face mask.

Masks aren’t just for your eye area! If you need to quickly revitalize your skin before applying makeup, a face mask is the perfect choice. Face masks can offer many benefits, from brightening to soothing to calming to exfoliating, so pick the one that your skin needs most. Masks should typically be applied after using a face cleanser but before any other steps in your skincare routine. Different masks have to be left on for different lengths of time, so follow the instructions on the packaging. Just like with the eye masks, leave yourself plenty of time to do the face mask before you need to apply makeup.

Choose lightweight serums.

If you’re a lover of super thick serums, it’s best to save those for nighttime, since they don’t always sit well underneath makeup. Instead, prioritize lightweight serums that soak in quickly and work well under makeup. You might even want to transition some of your morning serums, which have a more watery texture that soaks in even faster. 

use a lightweight moisturizer

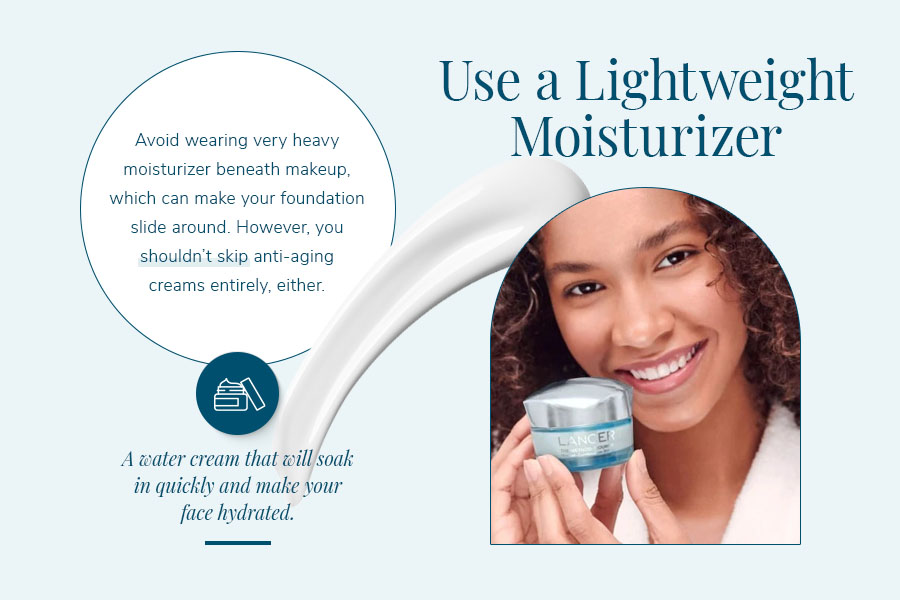
Use a lightweight moisturizer.

On a similar note, you should also avoid wearing very heavy moisturizer beneath makeup, which can make your foundation slide around. However, you shouldn’t skip anti-aging creams entirely, either — applying makeup to unmoisturized skin can make your dry, flaky patches really stand out. Instead, apply a lightweight moisturizer such as a water cream that will soak in quickly and make your face hydrated and glowing. If you have oily skin, look for an oil-free lotion so that it won’t make your face look too greasy as the day goes on.

Give yourself a facial massage.

A facial massage is another great way to get your blood flowing and help the lymph drain out of your face in order to prep your skin for makeup. You can do this at either the serum or the moisturizer step of your morning skincare routine (or both!). All you really need is your hands, but many people enjoy using a jade roller or a gua sha stone for a little extra pampering. If you struggle with puffiness, you can solve the problem by using a stainless steel roller that has been cooled down in the fridge or freezer first.

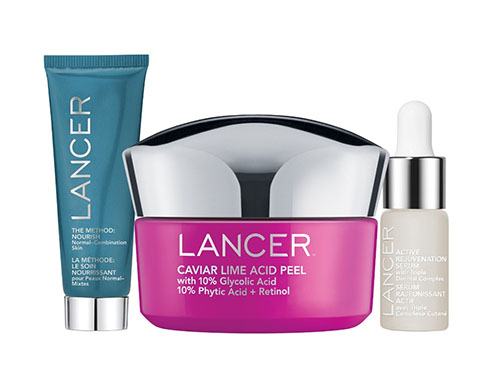
Discover Our 3-Step Skincare Steps

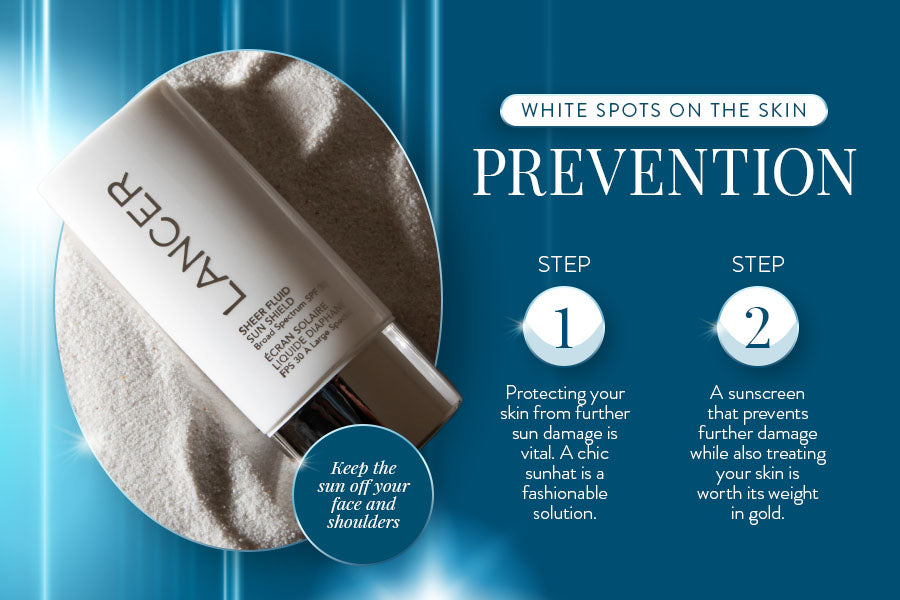
Never skip your sunscreen.

You should wear sunscreen every day, regardless of whether or not you wear makeup. Even if your makeup claims to have SPF protection, it probably won’t be high enough to really protect your skin (and you probably don’t apply enough to reach the advertised SPF, anyway). Apply sunscreen with a protection of at least SPF 30 to all exposed skin, not just your face but also your neck and chest. Let it set down fully before applying your makeup to ensure that everything stays in place throughout the day.

Don’t apply too many skincare products.

If you’re a fan of the 10-step skincare routine, try to do that at night time only. The more products you pile up on your face, the more likely it is one of them will conflict with your makeup. Instead, keep your morning routines to the essentials, such as balancing toner, vitamin C serum, light moisturizer, and eye cream. Choose multi-tasking products packed full of powerful ingredients that deliver the same benefits in one package. This will also ensure your skincare products soak in faster and you can apply your makeup sooner (more on this in a minute).

dont forget about your neck

Don’t forget about your neck.

Even if you only apply foundation to your face, you’ll still need to blend it over your jawline and down your neck so that you don’t end up with a stark line. If you don’t prep the skin on your neck for makeup, then the makeup may cling to dry patches or settle into lines. When you’re applying your skincare products, bring them down your neck and chest so that the skin in that area will be ready for makeup as well. And you should definitely be applying sunscreen to all exposed skin, including your neck.

Let everything soak in before applying makeup.

If you slap on your skincare and apply your makeup right away, it might not set properly no matter how well you prepped your skin. You should be waiting a minimum of 5-10 minutes between applying your sunscreen (the last step in your skincare routine) and applying your primer for your makeup. If you can, leave yourself even more time to ensure that your skincare is fully soaked in. 

For example, you can wash your face and do your skincare routine right when you wake up, and then let it soak in while you make coffee and eat breakfast. Then you can apply your makeup right before you leave the house.

Make sure your makeup and skincare are compatible.

Sometimes, your makeup won’t set even though you’ve tried every trick in the book. In this case, some ingredients in your makeup might be incompatible with ingredients in your skincare. For instance, if you’re using a water-based moisturizer but a silicone-based foundation, the products will repel each and the makeup will slide around your face. Same goes for your makeup products: Your primer and foundation also need to be based in the same ingredients or they won’t be compatible with one another.

use primer as a base

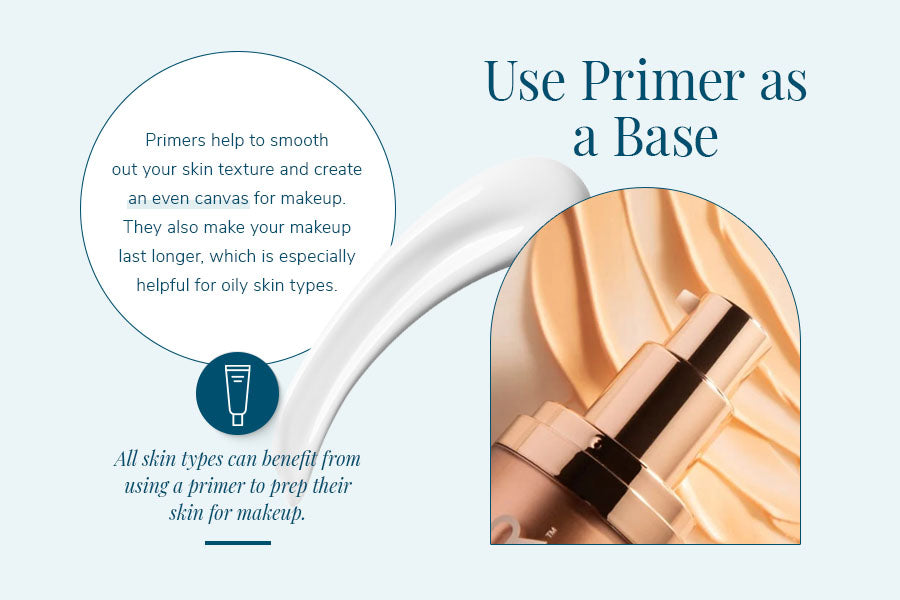
Use a primer as a base layer.

Some people find that their sunscreen works just fine as a primer, especially if it’s more silicone-based. However, other sunscreen formulations may not have the same effect, so if your sunscreen doesn’t fill in your pores or grip onto your makeup, you might want to try using a primer as a base layer. Primers help to smooth out your skin texture and create an even canvas for makeup. They also make your makeup last longer, which is especially helpful for oily skin types. However, people of all skin types can benefit from using a primer to prep their skin for makeup; you just have to find the right one for your skin!

Try a setting spray first.

Many people use setting spray after applying their makeup, but did you know that you can apply it before? It’s true! This trick works especially well for people with oily skin who find that their makeup starts melting after only a couple of hours. Apply your primer first, and then hit with a light mist of setting spray. Don’t spray it too heavily, or the droplets can bead up on the primer and cause it to break apart. You just want a fine, even mist that settles over your face and dries quickly. Blot your face with a damp makeup sponge if necessary before applying your foundation.

Prep your lips.

Even if your face is perfectly moisturized, if your lips are flaking and cracked, that will make it difficult to apply lip gloss or lipstick. Lipstick in particular can be very drying, which is why it’s so important to prep your lips for makeup. You should be exfoliating them regularly to remove dead skin and flaky patches. You should wear a thick lip balm during the night while you are sleeping and on days when you’re not wearing lip color. On the days that you wear lipstick, apply a thin layer of lip balm 10-20 minutes before you apply your lipstick so the more hydrating base coat can dry down.

We hope this guide helped you learn how to prep your skin for makeup! If you’re looking for a skincare routine that will sit nicely under your makeup, then shop our selection of Lancer skincare and get free shipping on all orders within the U.S.

Image Credits

Trovoboworod/Shutterstock.com

Kat Ka/Shutterstock.com

Nadiinko/Shutterstock.com

Olena Yakobchuk/Shutterstock.com

Say Hello to Marie Claire’s Fave At-Home Chemical Peel – Caviar Lime Acid Peel

We’re glowing a little brighter this week at Lancer Skincare because Marie Claire has just awarded our Caviar Lime Acid PeelMarie Claire US Skin Award-one of its favorites for treating mature skin! Whether you’re getting ready for an event, need a spa like facial at home, or your skin just needs an SOS, our Lancer Caviar Lime Acid Peel is the must have at-home chemical face peel for restoring that healthy glow and rejuvenating the skin! It is an absolute workhorse with high active ingredients that target a multitude of skin concerns at any age, but especially mature skin concerns. Dry skin, texture, fine lines and wrinkles, hyperpigmentation, breakouts, and more. You name it, Caviar can help!

Caviar Lime Acid Peel
with 10% Glycolic Acid + 10% Phytic Acid + Retinol

In Stock SKU:Caviar-NC
As low as $99.00

This award-winning, at-home face peel features Caviar Lime Extract, Retinol, 10% Phytic Acid, 10% Glycolic Acid, Pineapple and Papaya enzymes….and that’s just to name a few of the key ingredients that target mature skin concerns without the stressing telltale signs that some chemical exfoliants can leave behind. The result is a brighter complexion along with soft, smooth and supple skin.

To use this at-home chemical peel, first start by cleansing the skin with Dr. Lancer’s The Method: Cleanse. (Pro Tip: you’ll want to skip your polish step on this day since your Caviar Peel application will be the exfoliant in your skincare routine.) By thoroughly removing any makeup, dirt and debris first from the skin you ensure that it is ready to be treated and that there are no barriers such as makeup that inhibit the peel from penetrating the skin deeper, faster and evenly. Next, apply a generous amount to dry skin avoiding the eye area, lips and broken skin.

Caviar Acid Lime Peel

Leave on for 10-15 minutes. You may experience a slight tingle as the product starts to work but it should subside quickly! Remember this is an active chemical peel with potent ingredients to reduce fine lines, smooth texture, or help fade dark spots so a tingling feeling lets you know it is working. Follow up by rinsing thoroughly and patting the skin dry. Use can use 1 to 2 times weekly as tolerated. Caviar Lime Acid Peel is suitable for anyone showing signs of mature skin and aging and can even be used for those in their teens who are experiencing breakouts and post acne marks. Caviar Lime Acid peel is a great at-home peel for every skin type.

You might love some of our other favorites that we recommend pairing with Caviar Lime Acid Peel for the ultimate at-home skincare treatment. We recommend trying our Lift and Plump Sheet Masks which hydrates and calms the skin, our Triple Peptide Drops which is a concentrated age-fighting elixir that contains firming peptides and strengthens the skin barrier, and finally our Eye Contour Lifting Cream that treats fine lines, wrinkles, puffiness and dark circles.

Whatever your skin concerns, Lancer Skincare is the leading industry expert when it comes to ensuring your skin is at its brightest and healthiest! Thank you to Marie Claire for our latest award for Caviar Lime Acid Peel: a US Skin Award and a favorite for treating mature skin. You can shop Caviar Lime Acid Peel and our other skincare must-haves for the best skin yet. Shop now! 

The Ultimate Summer Skincare Checklist

summer writing on back in sunscreen

By Estrada Anton / Shutterstock.com

Skincare routines should be updated seasonally, and summer is no exception. With warmer weather already arriving, here are nine action items that you should have on your summer skincare checklist this year:

Use SPF regularly.

Wearing SPF every day is important no matter the season, but it’s especially critical during summer when daylight hours are longer. Choose anti-aging sunscreen with protection of at least SPF 30 and apply it to all exposed skin. When you are outside, apply sunscreen every two hours, especially if you are sweating or getting in and out of the water.

Seek out shade.

Beyond just applying sunscreen, you should also try to limit your sun exposure by seeking out shade whenever you are outside. Protect your skin with a wide-brimmed hat, as well as sunglasses, to slow down signs of premature aging such as wrinkles and fine lines! Try to avoid being in the sun between the hours of 10 a.m. and 4 p.m. when the rays are the strongest.

Tan the safe way.

If you love a bronze glow during the summer, with your skin frying while lying out in the sun or getting in a tanning bed, both methods expose your skin to UV radiation, and not even skincare for wrinkles can reverse all the effects. Instead, get a glow with tanning products that contain DHA, either at a spray tan salon or by using self-tanning products at home. You’ll get a totally safe glow in just a matter of hours, with no accidental sunburn or weird tan lines resulting.

sun drawn in sand with sunscreen

By Oksana Mizina / Shutterstock.com

Lighten up your skincare routine.

Now that winter is over, it’s time to say goodbye to thick serums and heavy creams. Instead, focus on lightweight skincare products that will still deliver the benefits you need. Also look for products that offer multiple benefits so that you don’t have to layer on multiple products to get the same effects.

Shop All of Our Any Aging Skincare Products

Prioritize antioxidants.

Antioxidants help protect your skin from free radical damage caused by things like dirt and pollution. Since most people spend more time outside during the summer, it’s important to make sure that you are incorporating antioxidants into your anti-aging skincare routine. Try applying a vitamin C product like our Vitamin C Radiance treatment in the morning to protect your skin all day long.

Exfoliate the right amount.

Most people’s faces produce more oil in the summertime, which means that they can exfoliate more often than in the winter. However, it’s important not to go overboard and over-exfoliate your face in an effort to control the oil. This can damage the skin barrier and lead to more problems down the road. Instead, exfoliate with a quality polish a few times a week to keep your skin looking smooth yet nourished.

side view woman wearing sun hat

By Ground Picture / Shutterstock.com

Don’t stop moisturizing.

Many people are tempted to skip moisturizer during hot summer days. While we understand the inclination, this can upset the balance of your skin and hurt it in the long run. Instead of skipping your moisturizer altogether, choose a lightweight water or gel cream that will absorb instantly instead of sitting on your face. If you have dry skin, use a lightweight moisturizer during the day and a heavyweight moisturizer at night so that you don’t feel sticky during the day.

Redo your makeup routine.

In addition to lightening up your skincare routine, you should also try to pare back on your makeup routine. Summer heat and sweat can cause makeup to slide right off your face, so wearing fewer layers can keep you looking good for longer. For instance, instead of a full coverage foundation, you can try a tinted moisturizer, and you might be able to eliminate certain products such as highlighters altogether.

Keep showers short.

Some people shower more than once during summer to stay feeling fresh, which means that it’s essential to keep those showers as short as possible — no more than five minutes each. You should also turn the temperature down to lukewarm or even cool, since hot water is quite drying for the skin.

Ready to get a jumpstart on your summer skincare checklist? Browse the skincare travel kits available from Lancer Skincare so that you don’t have to worry about packing for your summer trips. You’ll get free shipping on whatever you order, no minimum required!

How to Exfoliate Skin 6 Different Ways

How to Exfoliate Skin 6 Different Ways

Years ago, your only option for exfoliating your face was using a washcloth. Nowadays, the beauty industry has exploded with various skincare products and tools that can be used to exfoliate your face. In this guide, we’ll walk you through the pros and cons of six different ways to exfoliate your skin: cleansing with a face wash, using a scrub, applying a leave-on treatment or serum, trying a wash-off mask, using a traditional washcloth, and upgrading to a cleansing brush. If you’re new to exfoliating, be sure to check out our guide that explains how often you should exfoliate, plus other tips for exfoliating your skin. And don’t forget to browse our selection of tried-and-true skin exfoliators!

How to Exfoliate Skin with an Exfoliating Wash

Exfoliating washes are facial cleansers that contain alpha hydroxy acids (AHAs), beta hydroxy acids (BHAs), and polyhydroxy acids (PHAs). These chemical exfoliators work to dissolve the bonds between dead skin cells to wash them away. Some exfoliating washes also incorporate capsules or granules that physically brush away dead skin cells, although this is more common in face scrubs than washes (more on that in a minute).

Exfoliating washes are a good choice if you are looking to simplify your skincare routine and want to skip a separate exfoliating step. They are also a great choice for people with sensitive skin who find that other, stronger exfoliating treatments irritate their face. Because exfoliating washes are only on your face for about 60 seconds at a time, they may be less irritating than other options on this list. Some people can even tolerate using an exfoliating wash every day, while most other treatments can only be used one to three times a week.

To exfoliate your skin with an exfoliating wash, start by removing your makeup and sunscreen completely with a makeup remover. Once your face is clean and bare, dispense roughly a dime-size amount of the exfoliating cleanser into your palm and work it into a lather in between your hands. Then gently massage it over your face for one minute total, paying special attention to any areas where you have more pronounced dry patches. Don’t open your eyes, as the exfoliating wash will make them burn. Once the minute is up, rinse your face off with warm (not hot) water and proceed with the rest of your shower or skincare routine.

How to Exfoliate Skin with a Scrub or Polish

How to Exfoliate Skin with a Scrub or Polish

Scrubs are one of the most popular ways to exfoliate your skin. Scrubs have a rough texture that harnesses the power of physical exfoliation to clear away dead skin cells. Some of them also contain AHAs, BHAs, PHAs, and fruit enzymes so that you get the benefits of chemical exfoliation as well. For example, all of our Lancer Skincare polishes combine both physical and chemical exfoliation for very effective results.

Scrubs are very effective and simple to use, but they may be too harsh for extremely sensitive skin. You should also skip scrubs (and, really, any kind of exfoliation) if you have any open cuts, scrapes, or acne lesions, since the exfoliation can cause them to become irritated or infected. Scrubs can be used between one to seven times a week, depending on your skin tolerance.

To exfoliate your skin with a face scrub, start by removing your makeup and washing your face with a non-exfoliating cleanser. Depending on the product directions, you may apply the scrub directly to wet skin, or you may need to pat your face dry first. If the product can be applied to damp skin, you may find it easier to use the scrub in the shower so you can just rinse it away without worrying about getting messy.

Dispense about a nickel’s worth of product into your palm, and then gently spread it across your face, rubbing in small circles. Don’t put too much pressure on your skin or scrub too hard, and avoid the eyes and lips. Massage the scrub into your warm for a minute or so, and then rinse off the product with warm (not hot) water. Pat your face dry and follow it up with a nourishing serum and moisturizer.

caviar skin peel 5oz

Try a Face Peel

How to Exfoliate Skin with a Leave-On Treatment

Leave-on exfoliating treatments and serums have exploded in popularity within the past few years. These skincare products use AHAs, BHAs, and PHAs to dissolve dead skin cells through the power of chemical exfoliation. Because they are designed to be left on the skin overnight, they typically contain lower concentrations of these ingredients than a wash-off mask or scrubs.

Leave-on exfoliating serums are available in all different formulas, from super-potent glycolic acid toners that work for oily skin to very gentle mandelic acid serums that for sensitive skin. If you are new to the world of leave-on chemical exfoliants, it’s best to start with a lower concentration and a gentler ingredients (such as polyhydroxy acids) that have a lower risk of irritating your face. If your skin does well, then you can work on building your tolerance for higher concentrations and stronger ingredients over time.

To exfoliate your skin with a leave-on treatment, start by removing your makeup and washing your face with a non-exfoliating cleanser, and then dry your face off completely. You can either apply the exfoliating serum directly to your bare skin, which will result in the most effective exfoliation, or you can put down a hydrating serum first if you have very sensitive skin. Apply a thin layer of serum all over your face, and then follow it up with a moisturizer to seal it in.

We recommend applying a leave-on exfoliator only at night, since it can make your skin much more sensitive to sun damage during the day. You should not use a leave-on exfoliator in the same routine as other powerful active ingredients, such as vitamin C and retinol, which will greatly increase your odds of irritating your skin. Some itching and tingling are normal when you first apply the product, but if your face burns or hurts, then you should immediately rinse off the product and discontinue use. If you’re looking for a more simple routine outside of a leave on treatment, our Gentle Exfoliating Peel Pads are another great way to exfoliate your skin! These pads are gentle and easy to use and are perfect if you’re travelling or on the go. 

How to Exfoliate Skin with a Wash-Off Mask

How to Exfoliate Skin with a Wash-Off Mask

Exfoliating masks and face peels are potent products that use chemical exfoliation to provide quick, effective results. These wash-offs masks can contain 30% or more AHAs and BHAs. Because the concentration is so high, they are typically designed to be used no more than once a week and left on for no more than 10 minutes at a time.

Exfoliating masks can’t get the same results as an in-office chemical peel offered by a dermatologist, but they are usually the strongest at-home exfoliating products available. As such, they are best used by veteran skincare aficionados who know that their skin has a high tolerance for exfoliating products. People with sensitive skin or those new to exfoliating should try a scrub or gentle leave-on serum first to get a better gauge of their skin’s tolerance.

To exfoliate your skin with a wash-off face peel like our Caviar Lime Acid Peel, start by removing your makeup and washing your face with a non-exfoliating cleanser. In most cases, you will need to dry your face off completely before applying the mask, but read the package directions to make sure. Apply a thin layer of product all over your face, avoiding the eyes and lips completely.

Never leave an exfoliating mask on for longer than the package directions state. If you have never used the product before, to prevent irritation we recommend leaving it on for as little as one minute before rinsing it off. Over time, you can build your tolerance until your skin can handle leaving the mask on for the full amount of time. When you’re done with the mask, thoroughly rinse off your face with warm (not hot) water and pat it dry. Follow it up with a nourishing serum and moisturizer to soothe your skin.

vibrant glow products

Browse All of Our Skincare Products

How to Exfoliate Skin with a Washcloth

Washcloths were basically the original exfoliating treatment; the rough surface of the fabric wipes away dead skin cells using physical exfoliation. While there are plenty of more advanced treatments available today, some people prefer the old-school method of using a washcloth to exfoliate. Washcloths are inexpensive, and most people already have them lying around the house, so they are very accessible.

For best results, use a clean washcloth every time to avoid contamination with germs. If possible, we recommend having dedicated washcloths that you only use for your face if you are set on using a washcloth to exfoliate your face. Washcloths are also an awesome option for exfoliating your body (which is less sensitive than your face), but it’s better to use separate washcloths for that.

To exfoliate your face with a washcloth, start by removing your makeup and sunscreen completely with a makeup remover. Once your face is clean and bare, put some face wash on the washcloth and gently move it in circles on your face. Don’t press too hard or scrub vigorously; your movements should be gentle and soft. Do this for about 60 seconds, moving all over your face and concentrating on the most pronounced dry patches. Once the minute is up, rinse off your face with warm (not hot) water and rinse out the washcloth.

How to Exfoliate Skin with an Exfoliating Device

How to Exfoliate Skin with an Exfoliating Device

Exfoliating devices are basically the modern-day, high-tech version of a washcloth’s physical exfoliation. Our Microdermabrasion device features a patented 180 degree swivel neck effective for targeting hard to reach areas and 3 vacuum suction settings for customized exfoliation on different areas of the face and body. Our device also comes with 200 disposable filters to trap dead skin and keep the device in optimal condition, tweezers for replacing filters and one travel pouch. Maintaining your device will ensure maximum exfoliation and use. 

To exfoliate your face with our exfoliating device, start by removing your makeup and sunscreen completely with a makeup remover. Once your face is clean and bare, apply a small-size amount of face wash to the head of the brush and turn it on. Move the brush gently around your face, starting on your forehead and working your way down. Keep the brush away from your eyes and lips, which are very delicate. Do this for about 60 seconds total, and then turn off the brush and rinse both your face and the brush with warm (not hot) water.

Looking to add an exfoliating product to your skincare routine? Check out our skincare sets, which feature our polishes and face peels. All Lancer Skincare products come backed with our 30-day money-back guarantee, plus all U.S. orders come with free and fast shipping, no order minimum required. Shop today to start your journey toward smooth, glowing skin with our exfoliating products.

Image Credits

Rolling Stones/Shutterstock.com

Tatevik Bagdasaryan/Shutterstock.com

How to Get Rid of Puffy Eyes Fast

How to Get Rid of Puffy Eyes Fast

Puffy eyes make you look tired and older, not to mention they can be dry and irritating. They’re also pretty common, and pretty much everyone is going to wake up with puffy eyes at least once in their lives. In this guide, we’re exploring what causes puffy eyes, explaining how to get rid of them fast with eye care products and offering tips for preventing puffy eyes in the first place.

What Causes Puffy Eyes?

First of all, we want to clarify that puffy eyes are different from dark-colored under-eye bags, although they can occur at the same time. Having dark patches below your eyes is mostly caused by genetics, and may persist even after you relieve your puffiness.

Puffy eyes are also different from swollen eyes, which are usually a sign of allergies, colds or another medical condition, and are often accompanied by itching and involuntary watering of the eyes. Swollen eyes are treated by addressing the underlying condition. While trying to directly reduce the swelling of your eyes may temporarily relieve your symptoms, if your eyes are swollen instead of puffy, eye swelling won’t completely go away until you address whatever is causing it.

If you’ve determined that you truly have puffy eyes, there are multiple factors that could be causing them. The most common is crying, which irritates the eye area and dehydrates it, resulting in a puffy appearance. Even if you don’t cry, holding back tears can also cause the eye area to appear puffy.

puffy eye causes

Many people also experience puffy eyes upon first waking up in the morning because the lack of blinking all night has caused fluid to gather around the eye area, which can contribute to a feeling of puffiness. Paradoxically, lack of sleep can also result in puffy eyes because sleep deprivation causes the retention of blood and other fluids in that area specifically.

Eating too much sodium can lead to fluid retention in any part of the body, which also includes puffy eyes. Usually, this will be accompanied by swelling in other parts of the body as well, but not always.

Finally, physical changes due to aging can lead to the appearance of puffy eyes. That’s because as we age, the fat deposits around our eyes begin to break down and the collagen in our skin is not replenished at the same rate. This causes the fat around the eye to move out of place and the skin around the eye to sag. This can sometimes result in a puffy or baggy appearance around the eye area.

Shop Our Products for Puffy Eyes

How to Get Rid of Puffy Eyes Fast

Woke up with puffy eyes and need to make them go away — fast? Here are five strategies that can make your puffy eyes look better quickly.

Apply a cold compress.

The best way to reduce any kind of swelling fast, including eye puffiness, is to apply some sort of cold compress to the area. There are many different options for this, from the classic ice cube to a cold wash rag to a spoon that has been frozen for a couple of minutes. If you often experience puffy eyes, then you might want to invest in some eye Joe packs or another dedicated item that you can keep in your freezer for regular use. Be sure to sanitize these items before placing them on your face to avoid accidentally transferring germs and bacteria to your eye area, which can potentially lead to infection and make the swelling worse.

Use an eye product with caffeine.

When used in skincare products, caffeine acts as a vasoconstrictor, which means that it will temporarily tighten up blood vessels and reduce the appearance of puffiness and swelling. Some DIY home treatments seek to harness the power of caffeine by placing black teabags directly on the eye area — but you’ll have better results if you choose an eye cream for puffy eyes that contains caffeine instead. Carefully dab the eye cream on the affected area, being careful not to actually get it in your eye. The effect won’t last forever, but it is a great way to temporarily reduce your puffiness and make your face look more awake.

Get Rid of Puffy Eyes

Give yourself a facial massage.

Massage helps stimulate blood flow and reduce fluid retention. Giving your face a gentle massage is a great way to reduce eye puffiness. For best results, first, moisturize the area using a fragrance-free lotion or an eye cream specifically designed for the eye area. Then, using the tips of your fingers, gently massage the swollen area to help stimulate blood flow and reduce swelling. Be extremely gentle with your movements and keep your fingers away from your eyeball. Always wash your hands before touching your face — especially before getting close to your eye area — to prevent infection.

Treat your allergies.

If allergies are contributing to your puffy eyes at all, then treating those allergies will be the fastest way to get rid of your puffy eyes. In many cases, taking an over-the-counter allergy product such as an antihistamine will quickly (though temporarily) treat your symptoms, including puffy eyes. If your allergies are not responsive to over-the-counter treatments, then you may need to seek help from an allergist or other medical expert who can prescribe you a stronger treatment that will help alleviate your allergies, puffy eyes and other related symptoms.

Check your skincare products.

The area around your eyes is extremely sensitive and may react to skincare products that work well for the rest of your face. Your eyes are especially sensitive to fragrance, alcohol, acids and other potentially irritating ingredients. That’s why it’s always a good idea to use products specifically formulated for puffy eyes and be careful about applying other facial products directly to the eye area. If you have been doing that recently, check the ingredient list on those skincare products to see if they include any potentially sensitizing ingredients. If they do, that could be why you have been struggling with puffy eyes. Consider switching to eye care products that are meant to be used in that area.

lancer hyaluronic eye serum

Browse Lancer Skincare Eye Care Products

How to Prevent Puffy Eyes

Puffy eyes often have underlying causes that can’t be treated in just a few minutes. Here are seven lifestyle changes that will help reduce your chances of waking up with puffy eyes.

Get enough sleep.

We know that this is easier said than done, but getting enough sleep really is one of the best ways to both treat and prevent puffy eyes. Most adults need between seven and nine hours of sleep each night, and some people need even more depending on their individual circumstances. If you have trouble falling or staying asleep, try making some changes to your nighttime routine, such as staying away from screens for an hour before bed and making sure to sleep in a completely dark room. Taking melatonin in the short term can help you fall and stay asleep. But it isn’t a long-term solution, so you shouldn’t rely on it indefinitely.

Rethink your sleep position.

If you are getting enough sleep, but still waking up with puffy eyes, then your sleep position might be to blame. If you are a side or stomach sleeper, then you press at least one side of your face into the pillow all night, which can lead to puffiness and swelling, including around the area. Try sleeping on your back without pressing your face to the pillow. You might also want to try slightly elevating your head by sleeping on two pillows stacked on top of each other, which will discourage fluid from draining toward your face and potentially cause a swollen appearance when you first wake up in the morning.

Remove your makeup before sleep.

If you’re not very dedicated about removing your makeup before you sleep, that could also be contributing to your puffy eyes first thing in the morning. Makeup can be very irritating if it gets directly in your eye, and when you sleep, you move around which can cause it to transfer from your face to the pillow and back again. Make it a priority to completely remove your makeup before getting in bed each night, and change your pillowcase often to boot — at least once a week. If you tend to get back late, try keeping some makeup wipes on your nightstand right next to your bed so you don’t have to worry about washing your face in a pinch.

prevent puffy eyes

Wear sunscreen.

Wearing sunscreen every day is one of the best ways to prevent age-related skin changes — and that includes puffy eyes. This is because constant exposure to UV rays can hasten the creation of wrinkles and sagging of skin, which contribute to the appearance of puffy eyes. Choose a sunscreen that has at least SPF 30 protection, apply it every day and reapply it every two hours when out in the sun. Be cautious of sunscreens that are high in alcohol, fragrance and other potentially irritating ingredients. If your eyes are extremely sensitive to sunscreen, try a mineral sunscreen, which tends to be less irritating than a chemical sunscreen. Don’t skip putting sunscreen on your eye area though. The skin around your eye is the most delicate of your entire face and will be one of the first areas to start wrinkling.

Stay hydrated.

If you are dehydrated, then your body will retain fluid, which can cause swelling in many different areas of the body, including your eyes. Most people need somewhere between three and four liters of water a day, and some individuals may need more if they sweat a lot. Try to drink at least that much each day. If you don’t like the taste of plain water, you can freeze it with fruits and vegetables to make it taste more exciting without adding sugar or sodium. Be careful of beverages such as caffeine and alcohol that contribute to dehydration. More on alcohol in a later section.

Watch your sodium intake.

Eating too much sodium can cause your body to retain water in an effort to balance it out. Sodium does not only come from table salt but it is also present in many different foods — especially prepackaged foods. If you suspect that your diet is high in sodium, watch how much salt you’re adding to your meals and also check the nutrition labels on your food to see how much sodium they contain. You might be surprised to see that even foods that do not taste salty can actually contain very high levels of sodium. Finding lower sodium substitutes will help to lower your levels and encourage your body to retain less water.

woman holding out glass of water

Drink less alcohol.

We love a good cocktail as much as the next person, but, unfortunately, alcohol contributes to dehydration, which in turn can cause your body to retain fluid in both the eye area and the rest of your body. Alcohol also disturbs your sleep cycle, making it harder to both fall and stay asleep and further contributing to puffy eyes. Try to make alcohol drinks an occasional indulgence instead of a regular habit, and don’t be surprised if your eyes start looking less puffy as you start drinking less.

At Lancer Skincare, all our products are based on tested ingredients that have proven their efficacy over time. Whether you’re buying an eye cream or an entire 3-step skincare set, you’ll be getting a quality product backed by science and designed by celebrity dermatologist Dr. Lancer so you know that you will get results. Order today and get free shipping on your U.S. order!

Image Credits

Kateryna Onyshchuk/Shutterstock.com

HstrongART/Shutterstock.com

Ground Picture/Shutterstock.com

Dmytro Flisak/Shutterstock.com

Golubovy/Shutterstock.com

wavebreakmedia/Shutterstock.com

Can You Use Glycolic Acid with Retinol? Your Questions Answered

Close up african american young woman holding brown glass bottle with spa cosmeticsat hone. Beauty blogging, salon therapy, self skin care, mockup, minimalism concept

By Alex and Maria photo / Shutterstock.com

Both glycolic acid and retinol are potent skincare multitasking agents that offer lots of benefits in a single package. This begs the question: Are these ingredients too powerful to be used together? In this guide, we’re taking a look at why you might want to include both glycolic acid face peels and retinol in your skincare routine, and whether or not you can use both of these ingredients together.

What Is Glycolic Acid?

Glycolic acid is an alpha hydroxy acid derived from sugar cane. Glycolic acid is a chemical face exfoliator that helps to dissolve the bonds between dead skin cells. Glycolic acid offers many benefits, including more even skin tone and texture, better oil control, reduced acne breakouts and faster skin cell turnover.

Glycolic acid comes in many different forms and concentrations — from daily face washes to monthly face peels to glycolic acid body lotions. Many people like to use glycolic acid in a leave-on treatment that they apply one to three times weekly, depending on how often their skin needs it.

Shop Our 3-Step Skincare Sets

What Is Retinol?

Retinols are a subcategory of retinoids, which are all derived from vitamin A. Retinols are not as potent and are generally available over the counter, while retinoids are stronger and generally only available through a prescription from a dermatologist. Retinoids promote collagen growth, which helps to prevent and reduce the appearance of wrinkles and also to lighten dark spots and control acne.

Retinols are typically sold in a serum form, but you may find the ingredient incorporated into other products, such as body lotions, as well. Retinols can be sensitizing and drying to the skin, so you should start by applying it once per week underneath moisturizer and then work up to increasing the frequency to every other day.

laboratory dishes and glassware on a lab table. fermentation, fermented beauty skin care. container with cream or solution or serum for anti age treatment, powder cosmetic ingredient

By Y.P.photo / Shutterstock.com

Can You Use Glycolic Acid with Retinol?

Once upon a time, you might have been cautioned against using retinol and glycolic acid together in your 3-step skincare routine. Now, research has shown that alternating glycolic acid and retinol can be more beneficial than using one or the other exclusively. That’s because retinol speeds up skin cell turnover, while glycolic acid takes care of the extra dead skin cells. In fact, if you use retinol without some kind of exfoliator, you might eventually find yourself with a lot of dry, dead skin cells on your face — and nobody wants that.

However, it’s generally not a good idea to use glycolic acid and retinol in the same routine since they are both very strong ingredients and applying them to your face at the same time can lead to irritation. Furthermore, both retinol and glycolic acid should be used at night because they make your skin more sensitive to the sun. This means that it’s best to alternate your glycolic acid with your retinol in your nighttime routine (don’t put one on in the morning and another at night, in other words).

Close up of woman looking in mirror check face after mask cream beauty treatment feels satisfied admire reflection, laser skin resurfacing, glycolic acid peel, anti-ageing skincare procedures concept

By fizkes / Shutterstock.com

Buy Our Glycolic Acid Body Lotion

Glycolic Acid vs. Retinol: Which to Get Started with?

If you’re not currently using either glycolic acid or retinol, then choose only one to introduce at a time. If you try to use both glycolic acid and retinol without first building your skin’s tolerance, then you might accidentally damage your skin barrier.

You should start with glycolic acid if you are currently struggling with oil control, clogged pores and/or dry patches of dead skin cells. Glycolic acid is also a better starter product for people with sensitive skin because it is less sensitizing than retinol. On the other hand, you should start with retinol if you are currently focused on treating signs of aging, sun damage and/or acne.

Keep in mind that both glycolic acid and retinol are available in many different strengths. If you are just beginning your skincare journey, seek out gentler products with lower concentrations of these powerful ingredients. As your skin gets used to them, you can graduate to higher percentages of these ingredients and/or use them at a higher frequency. Watch out for signs of irritation and don’t be afraid to back off if you notice your skin barrier looking stressed.

At Lancer Skincare, we sell dermatologist-developed products that feature tried-and-true ingredients like glycolic acid and retinol so that you know you are using safe and effective skincare. All of our products ship free and come with a 30-day money back guarantee so that you can buy with confidence!

How Often Should You Exfoliate?

How Often Should You-Exfoliate

Exfoliating is one of the key steps to a weekly skincare routine, but you have to be careful with how much you exfoliate. If you don’t do it enough, then you won’t see the benefits — but if you do it too often, you’ll end up with redness, irritation, and a damaged skin barrier. So how are you supposed to know how often you should exfoliate with a face peel? In this ultimate guide, we’re exploring how often you should exfoliate, how to choose the perfect exfoliating product for your skin, how to get started exfoliating at home for the first time, and more. Here’s everything you need to know about exfoliating your face and body to reveal smooth, glowing skin all year round:

how often to exfoliate

How often should you exfoliate?

How often you should exfoliate depends on a variety of factors, including your personal skin type, the current weather and climate, other skincare products that you are using, and more. Here are some general guidelines for how often various skin types can consider exfoliating:

  • Sensitive and/or skin: One to two times a week to prevent over-drying the skin
  • Normal or combination skin: Two to three times a week; so roughly every other day
  • Oily skin: Anywhere between three to seven times a week depending on what products they use

Certain exfoliating products are designed to be used more frequently than others. For example, some face washes use such a low percentage of alcohol that they are suitable for people with oily skin to use every day. Meanwhile, more intensive wash-off peels should only be used weekly or every other week. It will probably take some trial and error to discover how often you should use a particular exfoliating product with your particular skin type. The climate and weather will also affect how often you can safely exfoliate. Most people can tolerate more frequent exfoliation during the summer, but need to cut back in the winter in order to avoid over-drying their skin. People living in humid climates can also typically exfoliate more frequently than people living in dry climates.

Browse Lancer Skincare Facial Exfoliators

What exfoliating products can you choose from?

There are many possible kinds of exfoliating products that you can choose from in order to suit your skin’s needs. Exfoliating products typically fall into two broad categories: physical and chemical. Physical scrubs use small particles to abrade away dead skin cells. Chemical exfoliators use alpha hydroxy and beta hydroxy acids to dissolve the bonds between dead skin cells so that you can wash them away. You can also get combination face exfoliators that combine physical and chemical actives for a truly effective exfoliation experience. You can find both physical and chemical exfoliating actives in many different formulations, including:

exfoliating face in mirror

  • Facial cleansers: These are designed for oil control and gentle everyday exfoliation. They are applied to the skin just like a regular facial cleanser and then washed off.
  • Toners: These leave-on treatments offer a thin texture that soaks in quickly. They may be intended for daily oil control or to provide deeper exfoliating effects two to three times a week.
  • Serums: These leave-on treatments are typically thicker in texture than toners and also more effective. They are designed to be used two to three times a week in most cases.
  • Masks and peels: These more intensive wash-off treatments are designed to be used once a week or every other week as needed to provide deeper exfoliation.
  • Scrubs: These wash-off treatments function similarly to masks but provide even more exfoliation.

When choosing what exfoliating products to use, it’s usually best to start with just one, especially if you are new to exfoliating or have sensitive skin. Doubling up on different products — for instance, following up an exfoliating wash with an exfoliating toner — can strip the skin of necessary oils and damage your skin barrier. Even some products that don’t specifically bill themselves as “exfoliating” may still contain acids, so check the label before applying a new product to your face.

How should you get started with exfoliating?

There are so many exfoliating products on the market now that it can be overwhelming to decide where to get started with exfoliating for the first time. If you are new to exfoliating, we recommend picking one single exfoliating product to start off. Toner and serums are a great place to start since they are typically less intense than masks and scrubs, and many people already have a face wash they are using.

If you are mostly looking at chemical exfoliants, look for a toner or serum with a lower percentage of acid to reduce the chances of stressing out your skin. If you have sensitive skin, you might also wish to seek out acids that have a reputation for being more gentle, such as mandelic and lactic acid. Before applying the exfoliating product, remove all your makeup and wash your face with a gentle cleanser. Pat it completely dry, and then apply the exfoliating product to your skin as directed. Follow a leave-on treatment with hydrating serums if you’d like, and then seal everything in with an anti-aging moisturizer.

woman applying face mask

Leave a wash-off treatment on your skin for no longer than the time listed on the instructions. These treatments are typically more intense, so many people have success with leaving one on for a minute or two at a time to get started, and then slowly increasing their tolerance until they can leave it on for the full amount of time. It’s normal to experience some mild stinging or tingling when you first apply the exfoliating product, and that will usually fade within a few minutes. However, a strong sensation of burning or pain is not normal; nor is unusual redness or splotches. You should immediately wash off the exfoliator if you experience any of these symptoms or think that you might be having an allergic reaction.

Start by exfoliating once a week to start. If that goes well, step it up to twice a week. You can eventually go up to three times a week if you think you need it. Once your skin adjusts to a regular exfoliation practice, you can consider incorporating a weekly or bimonthly mask for deeper exfoliation. People with exfoliation might also want to consider switching to a daily face wash or toner for oil control benefits.

What is the best time of day to exfoliate?

Once again, the answer to this question depends on your skin. Some people with very oily skin like to start off the day with an exfoliating wash or toner to help control shine until they get home. However, most people prefer to do stronger leave-on treatments and wash-off peels at night. This is because exfoliating makes your skin more sensitive to the sun, and doing it at night gives your skin time to recover without being immediately exposed to the sun.

Regardless of what time of day you exfoliate your face, you should always wear an SPF of 30 or higher during the day. While you should already be wearing sunscreen every day anyway, it’s especially important if you have a regular exfoliating practice since that makes you more sensitive to the sun and increases your likelihood of burning. Regular SPF use will ensure that you can continue to reap the benefits of regular exfoliation while minimizing your risk of side effects.

under and over exfoliating

What are the signs of under- and over-exfoliating?

If you don’t exfoliate your skin enough, then your skin will start to look dull and may develop a rough texture. People who are acne prone may also develop clogged pores or breakouts as their pores become congested from the build-up of dead skin cells. Other skincare products might also be less effective due to increased difficulty in penetrating that top layer of dead skin cells.

If you exfoliate too much, your face will start to feel dry and tight, can develop redness and irritation, and may even start flaking. Excessive exfoliation can lead to more skin problems, including eczema, microtears, broken capillaries, infection, and more. Be extra cautious of over-exfoliating if you have sensitive or dry skin, which is more vulnerable to over-exfoliation.

woman exfoliating face

What should you do if you have over-exfoliated?

If you are experiencing any signs of over-exfoliating, stop using all exfoliating products to give your skin a break and see how it does. You should also avoid putting exfoliating products in or around any cuts, scrapes, infections, and other openings in the skin. This will irritate your skin, delay the healing process, and potentially lead to scarring or other complications.

In addition to stopping your exfoliating products, you should also avoid foaming facial cleansers, retinol serums, and other skincare products that can have a drying effect on the skin. Instead, focus on using a mild cleanser and fragrance-free moisturizer to encourage your skin barrier to repair itself and avoid further irritation. If you have areas that are very red or raw, spot treat them with Aquaphor, aloe gel, hydrocortisone cream, or another soothing product.

Depending on how much you have damaged your skin barrier, it can take your face anywhere from a few days to an entire skin cycle (about a month) to repair itself. It’s really important not to start exfoliating your skin again until you are sure it’s entirely recovered. You will also need to slowly phase in your exfoliating once you start them up again to avoid stressing your skin out again.

Get the Lancer Anti-Aging Moisturizer

What about exfoliating the body?

Exfoliating the face gets a lot of attention, but exfoliating the body can be equally beneficial. There are many different products that you can use for exfoliating the body, including wash cloths, mitts, brushes, scrubs, body washes, and lotions. Just as with the face, exfoliating the body two to three times a week is a good goal to aim for.

Exfoliating during or after a shower is a great idea. Not only does the hot water soften your skin and open up your pores, but the water will also wash away dead skin cells as you exfoliate. Try to stand in the shower for at least five minutes or soak in the bath for 10 minutes before exfoliating to ensure that your skin is soft enough.

If your skin is sensitive, a wash cloth will be softer than a brush or scrubber while still providing an exfoliating effect. You may wish to pair it with a gentle exfoliating body wash if the wash cloth alone isn’t cutting it. Be sure to follow it up with a moisturizer to help nourish your skin after exfoliating and prevent moisture loss. You can also try a leave-on exfoliating lotion, which can have an exfoliating effect that runs from mild to intense based on what percentage of AHAs or BHAs they contain.

lancer high quality exfoliators

Looking for a high-quality exfoliating product to incorporate into your routine? Check out the selection of facial exfoliators and face masks and peels from Lancer Skincare. Developed by celebrity dermatologist Dr. Harold Lancer, all of our products are made with tried-and-true ingredients that are backed by evidence and which will deliver promising results. All of our Lancer Skincare products come with a 100% satisfaction guarantee and ship free within the U.S., so what are you waiting for? Order our products today to experience the difference in your skin!

Image Credits

MITstudio/Shutterstock.com

Daria Amari/Shutterstock.com

Juksy/Shutterstock.com

Zyn Chakrapong/Shutterstock.com

Cast Of Thousands/Shutterstock.com

Voyagerix/Shutterstock.com

TORWAISTUDIO/Shutterstock.com

JLco Julia Amaral/Shutterstock.com

How to Care for Congested Skin

On a daily basis, your skin is fighting against environmental pollutants, sweat, and pore-clogging makeup. And if you have oily or congested skin, it is already combating blockages in the pores from excess sebum and dead skin cells. Finding products that can effectively but gently clear skin’s buildup can be a difficult task. Even products that are labeled non-comedogenic, water-based, or oil-free might still have irritating ingredients that can exacerbate your skin condition. We recommend you use products that are customized to address your complexion’s particular needs, which is why Dr. Harold Lancer has drawn from his extensive experience as a world-class dermatologist to create the optimal routine targeted for oily skin.

Continue reading “How to Care for Congested Skin”

How to Take Care of Dehydrated Skin

When you have dehydrated skin—it shows. Skin that lacks moisture looks parched and lackluster. Skin appears brittle from the visible rough patches and flakiness. Lines and wrinkles look more pronounced when your complexion is depleted of its plump and supple texture. Add in a tight, itchy feeling, and you’ve got the definition of dehydrated skin. In addition to that tight, dry feeling and the visible wrinkles and roughness, you may notice that your skin is oilier than usual. While that may seem counterintuitive, many of the same triggers for dehydrated skin also prompt excess oil production. The good news: If you take proper care of your skin, those symptoms of dehydration can disappear, and your complexion will be restored to its optimal healthy level.

Continue reading “How to Take Care of Dehydrated Skin”

How to Treat White Spots on Skin

How to Treat White Spots on Skin
White spots on the skin occur when the production of skin pigment (a.k.a. melanin) is interrupted. This hypopigmentation disorder may be simply cosmetic, or it may be a sign of underlying health issues. In most cases, white spots on the skin are not a cause for concern, and they often clear up on their own within a few weeks. However, you might still want to get the white spots checked by your dermatologist just in case, especially if they persist for more than a couple of weeks.If you already have stubborn white spots that won’t go away, you may be wondering what to do about them even if they are benign. Many people don’t like the appearance of white spots on their skin, especially if the spots are very large or located in a prominent area. In this guide, we will explain common causes of white spots on the skin, how to prevent white spots from forming, and skincare treatment options for white spots on the skin.

Causes of White Spots on the Skin

There are multiple common causes of white spots on the skin, and each skin disorder requires a different treatment. It’s important to visit a dermatology office to get an office diagnosis and go over your treatment options so that you know exactly what you’re dealing with. There are six main causes of white spots on the skin to be familiar with:

1. Sunspots or guttate hypomelanosis

White spots can begin to appear on your skin after years in the sun without adequate protection. These spots — called idiopathic guttate hypomelanosis (IGH) — are generally relatively small, between 1-3mm. They aren’t itchy, raised, or painful, but some people find them unsightly, especially if they provide a stark contrast to their natural skin tone. Most treatments are cosmetic and focused on improving the appearance of the spots (more on this in the next section).

2. Tinea versicolor or pityriasis versicolor

Tinea versicolor occurs when a fungus living on the surface of the skin grows out of control. The fungal infection causes dry, itchy, scaly patches that may be either lighter or darker than the surrounding skin. Doctors will typically suggest applying over-the-counter antifungal shampoos, washes, soaps, and creams to the affected areas first. They may later prescribe antifungal pills for a short time if topical treatments have no effect.

white spots on the skin causes

3. Pityriasis alba

Pityriasis alba is a skin condition that causes red, scaly, itchy patches that leave behind faint white areas of skin once they heal. The condition is most common in children between the ages of 3-16 and maybe a mild form of atopic dermatitis. Symptoms often resolve on their own, but the healing process can be sped up by the application of moisturizers to soothe dry skin. Your doctor may also recommend the use of topical corticosteroid creams or nonsteroidal elidel cream.

4. Vitiligo

Vitiligo is a skin condition where large white patches of skin appear in areas where melanocytes (pigment-producing cells) have been destroyed. The cause is not known, but it may be an autoimmune disease related to immune system dysfunction. Possible treatments for vitiligo include:

  • Steroid creams
  • Elidel cream
  • Ultraviolet light therapy
  • Bleaching darker skin
  • Tattooing the white patches
  • Surgery to remove the upper portions of the affected skin

5. Milia

Milia are firm, painless sacs filled with white fluid that develop on the surface of the skin. Primary milia occurs when keratin becomes trapped under the skin and forms the sac. Secondary milia develops as the result of skin trauma, such as blistering, sunburn, dermabrasion, and other forms of tissue damage. Retinoid topical creams are usually the first recommended course of treatment, followed by topical steroids.

6. Eczema

Eczema is an inflammatory skin condition that causes itchiness, dry skin, rashes, scaly patches, blisters, and skin infections. During an eczema flare-up, the affected patches of skin may appear paler than the rest of the body, especially on darker skin. There are seven different types of eczema to know:

  • Atopic dermatitis
  • Contact dermatitis
  • Dyshidrotic eczema
  • Nummular eczema
  • Seborrheic dermatitis
  • Stasis dermatitis

Using gentle cleansers instead of harsh soaps and limiting your bath or shower time will help to calm down eczema flare-ups. The skin should be kept moisturized with an unscented lotion. The use of anti-itch creams will help to reduce symptoms and also discourage scratching (which will further inflame the skin). Taking an oral allergy medication such as anti-histamine may also help to reduce the inflammation. If these at-home remedies don’t control your eczema, then your doctor might recommend a  topical corticosteroid or another prescription treatment.

white spots on the skin prevention

Steps for Prevention of White Spots on Skin

Even if you’ve already developed idiopathic guttate hypomelanosis on your skin, protecting your skin from further sun damage is vital. A chic sunhat is a fashionable solution for keeping the sun off your face and shoulders, but it’s no replacement for sunscreen. A sunscreen that prevents further damage while also treating your skin is worth its weight in gold.

Wearing sunscreen with a minimum protection of SPF 30 is essential; in fact, there is relatively no difference in how much sun protection you receive between a sunscreen with SPF 30 and one with a higher SPF. The Sheer Fluid Sun Shield Broad Spectrum SPF 30 Sunscreen from Lancer Skincare is the ideal sunscreen for protecting your skin while also providing anti-aging benefits.

This weightless broad-spectrum sunscreen protects skin from harmful UV rays and treats it with plant extracts and plant-derived stem cells to improve your skin’s radiance and reduce the appearance of current sun damage. Even better, it works as a primer, allowing your makeup to glide on without the greasy finish of most sunscreens. You should apply sunscreen to all areas of exposed skin, even when sitting indoors, in order to prevent the IHG from getting worse.

Treatments for White Spots on Skin

Now that you know how to guard your skin from additional UV damage, it’s time to treat the appearance of the idiopathic guttate hypomelanosis already present on your skin. Though you can treat brown spots with anti-aging creams and antioxidants, white spots are different. White spots are an absence of pigment, and it’s rarely possible to make the pigment return to your skin. 

Lancer Plumping Nighttime Duo

You may not be able to reverse the loss of pigment in your skin, but you can treat the spots by evening the overall appearance of your skin, which makes spots less evident. Besides professional dermatology treatments, some skincare products for white spots that you can try at home include:

Sunscreen for White Spots

You can also prevent the white spots from expanding by protecting your skin with an anti-aging sunscreen at all times. In addition to keeping your existing white spots from growing and reducing the contrast between the white spots and your regular skin tone, sunscreen prevents further damage to your skin and helps stop additional white spots from developing. 

Exfoliation for White Spots

When you look for skincare that will provide you with a brightened, more even-looking skin tone, look for exfoliating products with active ingredients that polish (our way of saying exfoliate since this process should also be gentle on your skin) damaged skin to reveal fresher, younger-looking skin.

A cream with glycolic acid, like Dr. Lancer’s Retexturizing Treatment, can help reduce the appearance of discoloration and give your skin a smoother appearance. The 10% glycolic acid exfoliates skin to reveal glowing, younger-looking skin and a more even skin tone, counteracting the aging effect of sun-damaged skin. 

Because glycolic acid is a powerful Alpha Hydroxy Acid (AHA), this treatment also includes antioxidants and humectants to improve your skin’s hydration and lock in necessary moisture to maintain your bright, radiant look. When using an AHA, be extra vigilant about applying sunscreen, wearing protective clothing, and wearing a sunhat, as your skin will be more sensitive to the sun.

white spots on the skin treatments

Vitamin C for White Spots

Vitamin C is also a popular antioxidant for providing a brightened tone and addressing hyperpigmentation. While Vitamin C won’t eliminate your white spots, it will even out your overall tone and help lessen the darker spots surrounding the white spots, helping them appear less noticeable. 

Advanced C Radiance Treatment Cream is a powerful combination of 10% Vitamin C and retinol. Retinol helps exfoliate damaged, discolored skin, while Vitamin C reduces the appearance of hyperpigmentation for even skin. The combination of these two ingredients boosts skin cell regeneration and reduces the appearance of sun damage, while rich shea butter soothes skin with luxurious moisture for refreshed, younger-looking skin. White spots will be less conspicuous, and your skin will appear brightened and renewed. 

Discover Our Uneven Skin Tone Products

Self-tanner for White Spots

You can also try topical treatments to hide the differentiation in pigment using a self-tanner. If you’d like to try it on your own, you can carefully apply a self-tanner directly to the white spot. Use a small concealer brush or cotton swab to apply the self-tanner to the white spot itself, being meticulous about avoiding the darker skin surrounding it. Give it a chance to develop before deciding if you need another application. Though it may not be an exact match, tanning the affected area may make the spot blend in just enough with the rest of your skin to make it less obvious. 

Dermatology Treatments for White Spots

If you’ve used skincare with powerful antioxidants and AHAs for brighter, more even-looking skin, but you still wish to pursue further treatments, there are other options. An experienced dermatologist, like Dr. Harold Lancer, can assess your skin properly and proceed with treatments ideal for your skin.

intense pulsed light

Since you generally cannot correct the loss of pigment that causes white spots, you must instead treat the skin surrounding the spots. IPL — or Intense Pulsed Light — can be used to target and treat sun-damaged skin. This works by fading the darker skin surrounding the white spots, allowing the spots to blend in better with the rest of your skin. 

Another topical treatment is a medication called tacrolimus, an ointment normally used for eczema. This prescription treatment is not to be taken lightly since it’s an immunosuppressant. Still, it was shown to improve the appearance of IGH white spots in 11% of patients in a double-blind study. If you’ve tried other methods and want to pursue this treatment, see your dermatologist. 

Regardless of how you choose to treat your white spots, experts agree that sunscreen is the number one choice for preventing IGH and minimizing the appearance and growth of white spots on the skin. Sun damage can have lasting effects, but it is possible to treat and prevent further damage with the right sunscreen and high-quality skincare products.

Conclusion

There are multiple causes of white spots on the skin, including sun spots, tinea versicolor, pityriasis alba, vitiligo, milia, and eczema. Preventive steps, such as wearing sunscreen every day, are key to preventing white spots from forming on the skin. If you already have white spots, you might not be able to restore pigment to those areas, but you can even out your skin tone by using products such as glycolic acid, vitamin C, and self-tanner.

Image Credits

JoyImage/Shutterstock.com

Palau/Shutterstock.com

Kotin/Shutterstock.com

Luckyest/Shutterstock.com

Tatiana Foxy/Shutterstock.com

Stone36/Shutterstock.com